Any successful local SEO strategy is based on a rock solid foundation of in-depth and thorough keyword research. It can be a long and exhausting process that has to be done. So what happens when you need to do keyword research at scale for multiple locations in multiple cities? That’s when things can get a little hairy…
Have no fear! I am going to walk you through the exact process that I use on a daily basis to do local keyword research at scale for multiple cities and locations.
Let’s get started!
Develop Your Seed Keywords
The first small step in this journey is to identify your seed keywords, these keywords are generic head terms that are related to your business, typically a product or service.
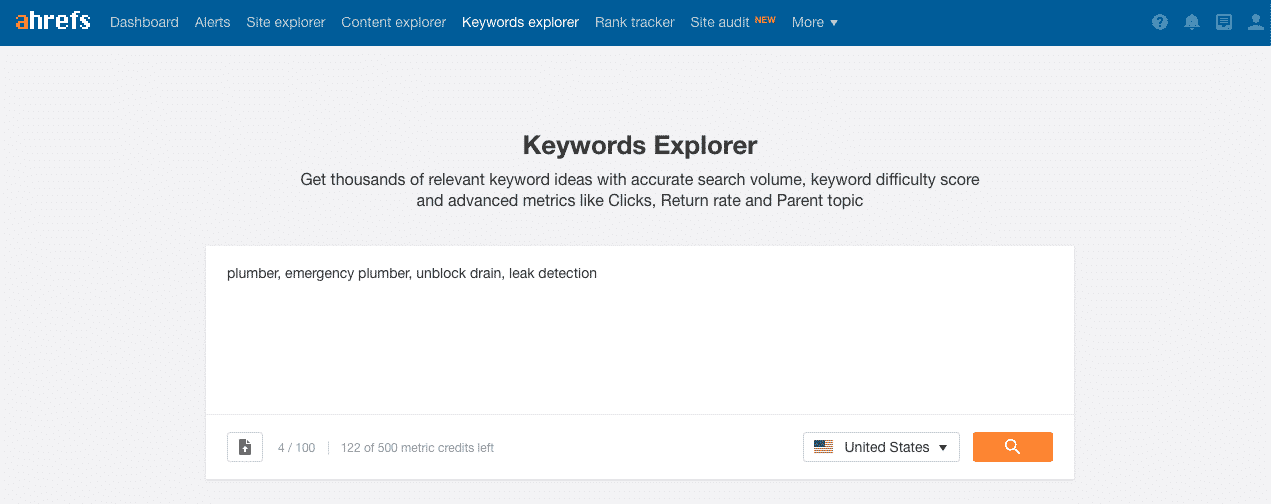
For example, if you’re a plumber, some of your seed keywords could be plumber, emergency plumber, unblock drain and leak detection.
Sit down and make a list of all of the high level generic terms that are related to your company and the products or services that you sell.
Find Long Tail Geo-Modified Keywords
Once you’ve developed your list of seed keywords, the next step is to use it to develop a keyword template list.
There are several tools out there such as KeywordTool.io, SEMRush, Answer The Public, Keyword Keg and Ahrefs to help you with this. For the remainder of this guide, I’ll be using Ahrefs.
Navigate to Ahref’s Keyword Explorer Tool and enter your seed keywords in along with setting the country that you’re research.
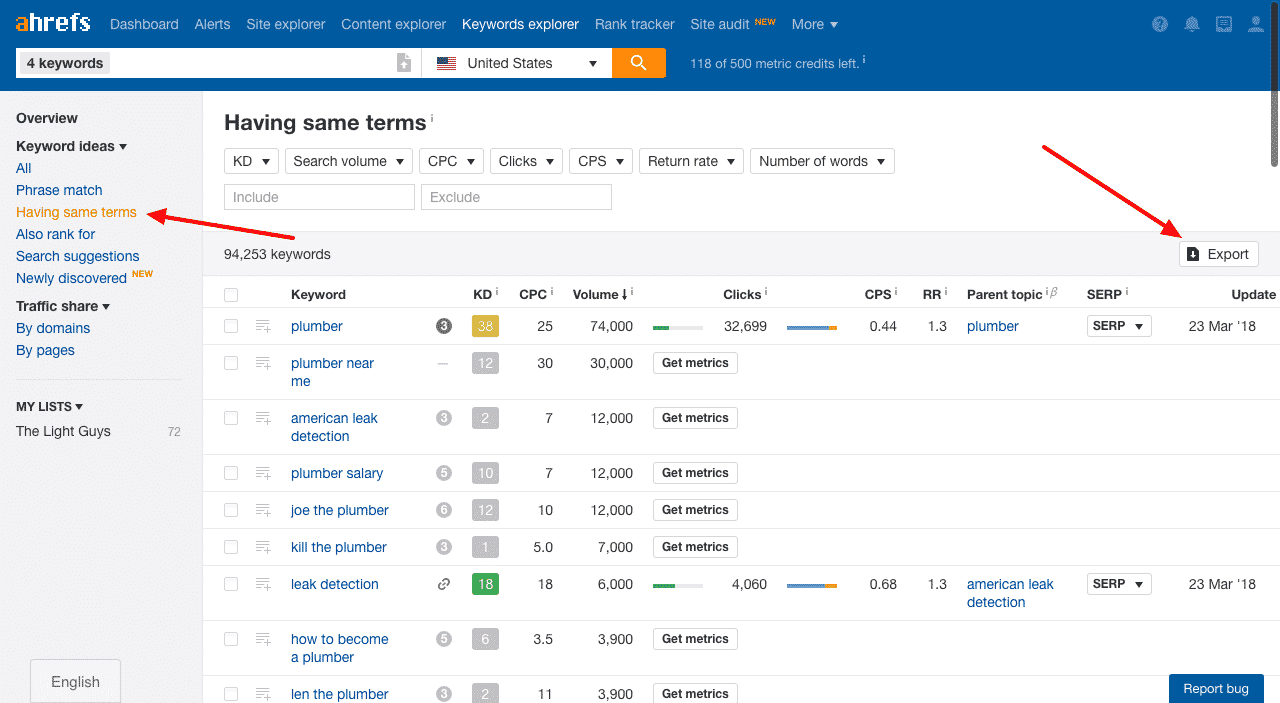
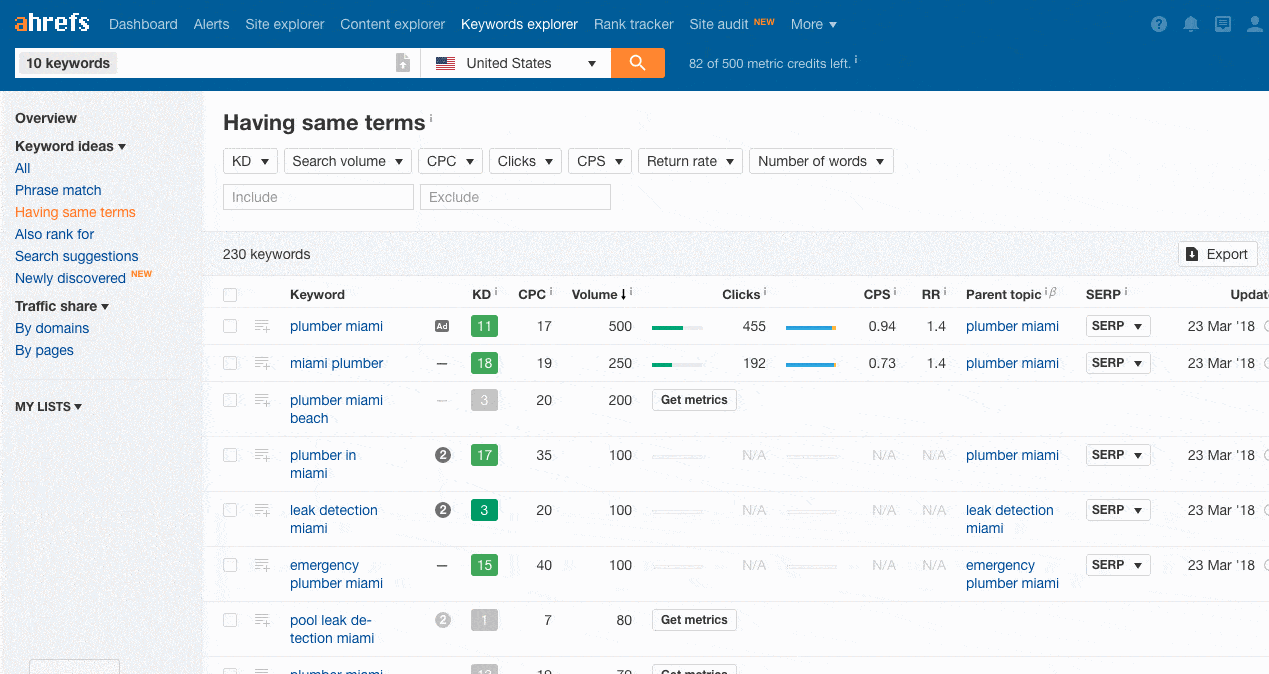
Once all of the data is loaded, go to the Have Same Terms report and export the data. The table that you’re presented with shows you all phrases that contain your seed keywords regardless of order.
In addition to these third party tools, make sure you’re also gathering keywords that your website is already using to generate traffic. There are several sources that you can use to pull this data.
Google Analytics
Sign into Google Analytics, using the navigation on the left hand side, click on Acquisition. Then click on All Traffic and then Channels. You’ll then be sent to a new page where you’ll see where your website’s traffic has been coming from, click on the Organic Search channel.
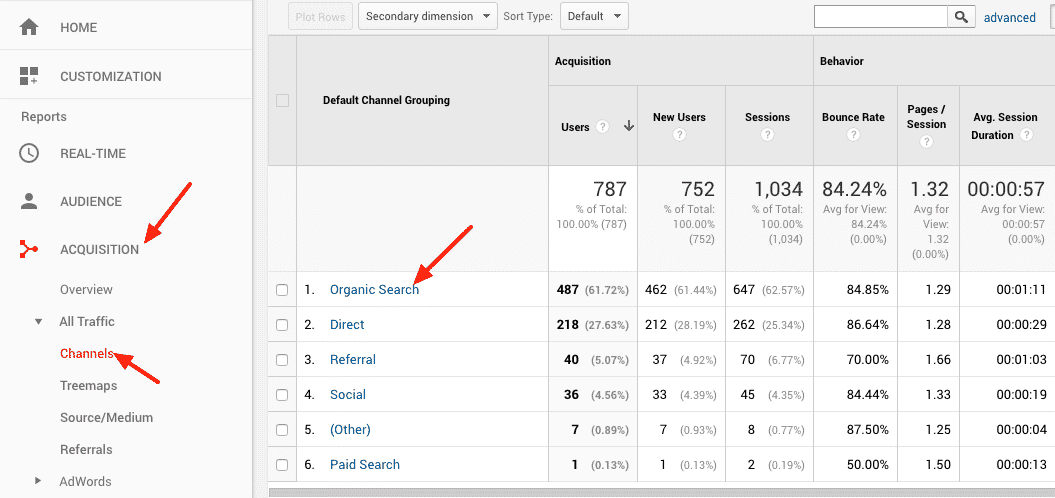
Depending on how much traffic your website gets from search engines you may need to adjust the date range. Once the new page has loaded, click on the Export button to download your keyword data.

Google Search Console
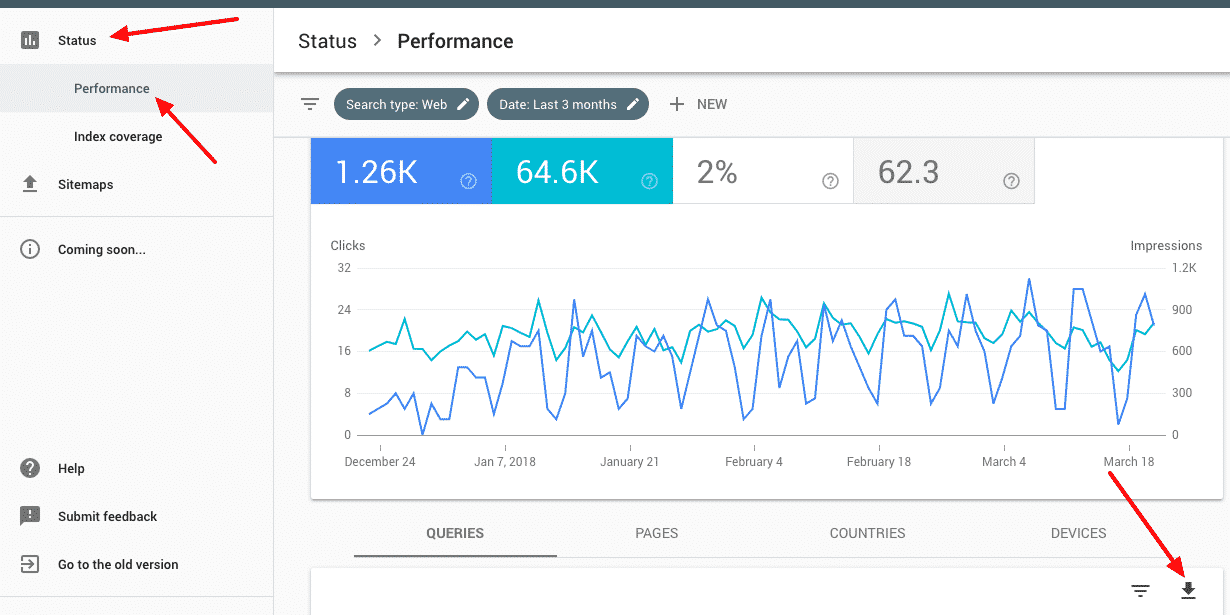
After logging into to Google Search Console, go to Status, select the Performance option and click on the download icon on the top right hand side of the table that appears:
Google AdWords
If you’re running Google Adwords, you can use your search terms report to identify keywords that you’ll be able to use to build templates from. To download your search terms follow this helpful guide that Google has written.
Ranking Data
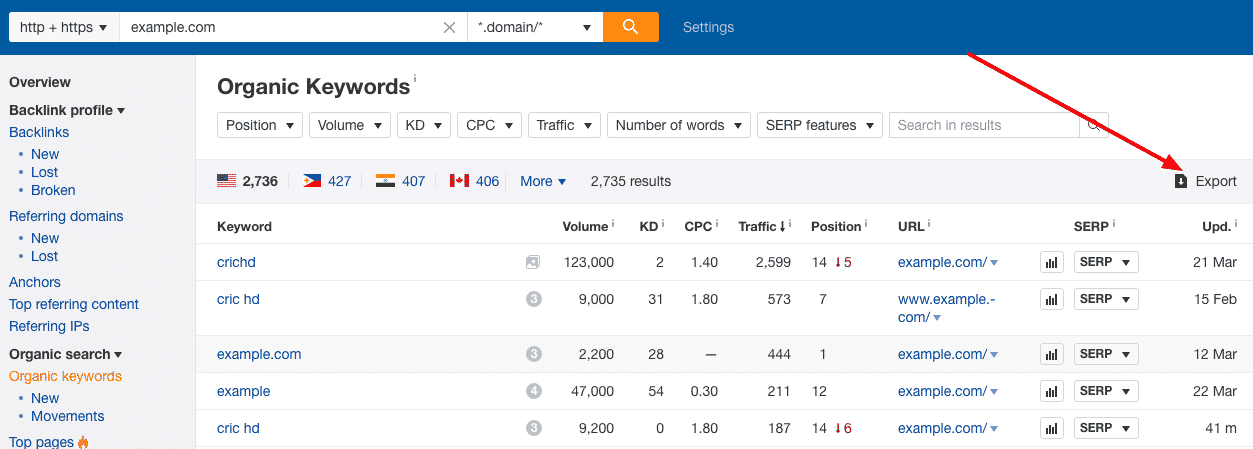
If your website is already established, you can use Ahrefs to pull the keywords that you’re already ranking for. Do this by entering your website into Ahrefs and click on the Organic Keywords link on the left hand side navigation.
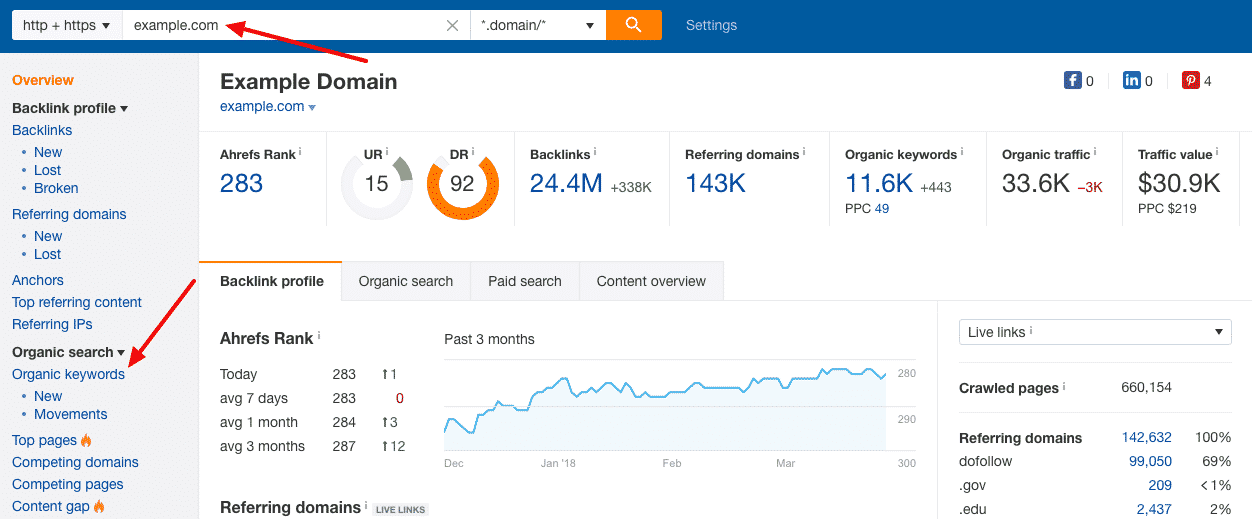
Then download your keywords by clicking on the export button at the top of the table on the right hand side of the page.
Pro Tip: Repeat this process on your competitor’s websites to uncover more keyword opportunities.
After you’ve downloaded all of your data from these different sources, combine them all into one list to get started on building your keyword templates.
Build Your Geo-Modified Keyword Templates
Next, we’re going to create your keyword templates. These templates are essentially keywords that contain a placeholder which will be replaced by the list of locations that you’re researching. By using keyword templates we’re able to dynamically long tail keywords with geo modifiers at scale without breaking a sweat.
To create your keyword templates go through the aggregated keyword data that you exported and look for any keyword that contains a city or geography in it. Take that keyword, place it into a seperate list and replace the geography with a placeholder such as {{city}}.
It is highly recommended that whatever placeholder you use, it is completely unique and will never appear in any of your keywords. This is why I personally like wrapping my placeholder in double curly braces ({{placeholder}}).
Below you can see an example of what the before and after would look like when transforming a keyword into a keyword template:
Original Keyword
Keyword Template
| Plumber Toronto | Plumber {{city}} |
| Miami emergency plumber | {{city}} emergency plumber |
| Plumbing company in Fresno CA | Plumbing company in {{city}} {{state abbr}} |
After you’ve gone through the exported keyword data, you should have a list of keyword templates.
As you’re going through the data, if you notice some obvious keyword templates were left out, be sure to add them to your list.
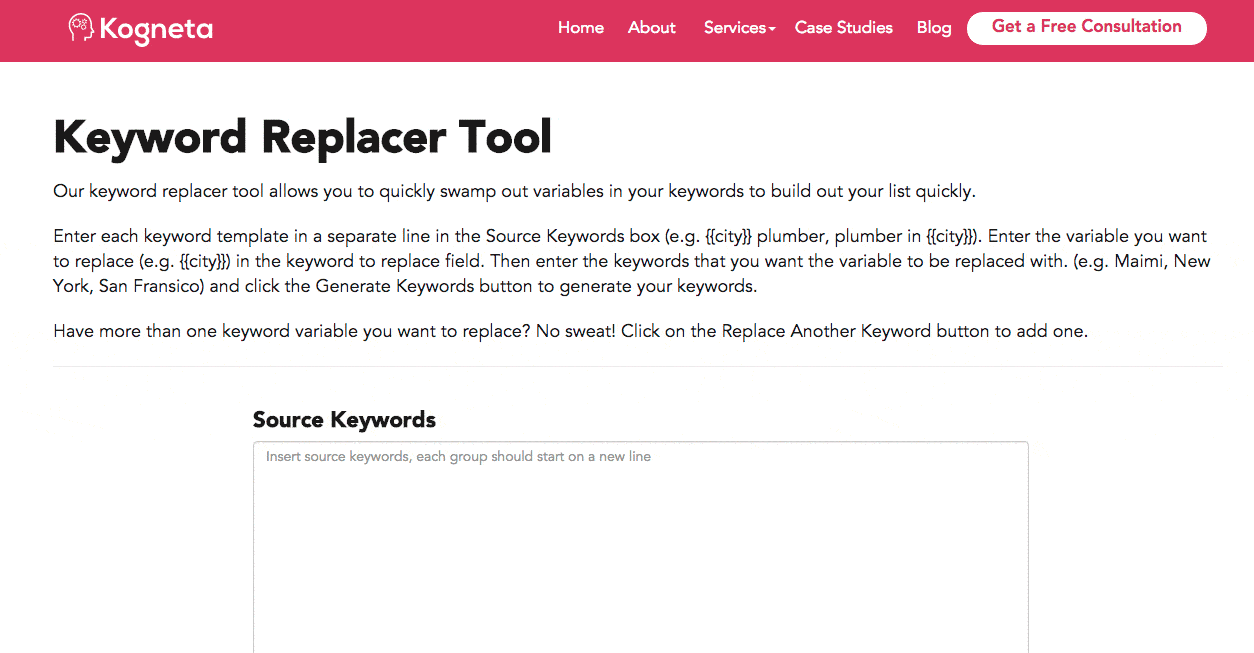
Multiply Your Keywords
The next step is to turn these templates into actual keywords that you can gather data on.
Using Kogneta’s Keyword Replacer tool, insert your list of keyword templates into the Source Keywords box. In the Replacement Keywords section enter the placeholder that you’ve been using (e.g. {{city}}) into the Replace text box and the list of cities that you want to replace in the With text box, then click on the Generate Keywords button.
The keyword replacer tool will then take all of the instances of {{city}} in your keyword templates and replace them with each of the cities that you put into the With box.
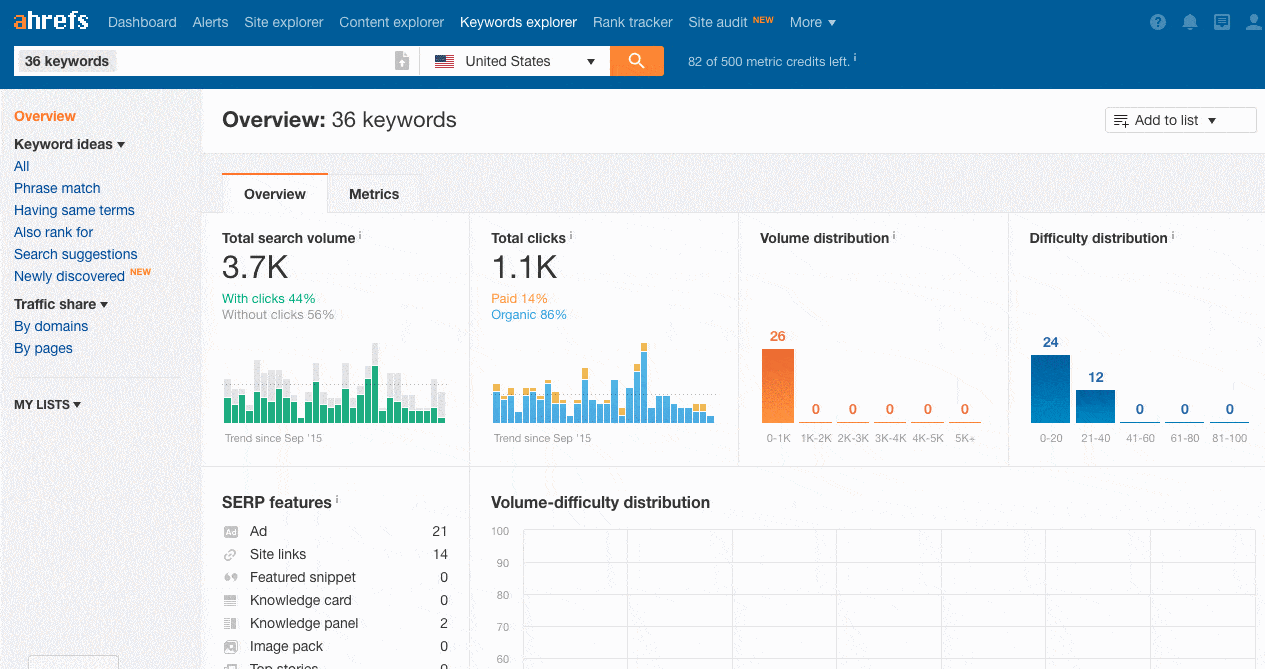
Gather Keyword & SERP Data
Armed with your long list of localized keywords, it’s now time to pull all of the data. Using Ahref’s Keywords Explorer tool, copy and paste in your generated keywords and hit search, while being sure to have the correct country set.
Note that the keywords explorer tool only allows you to enter up to 100 keywords at a time so you may need to repeat this process several times.
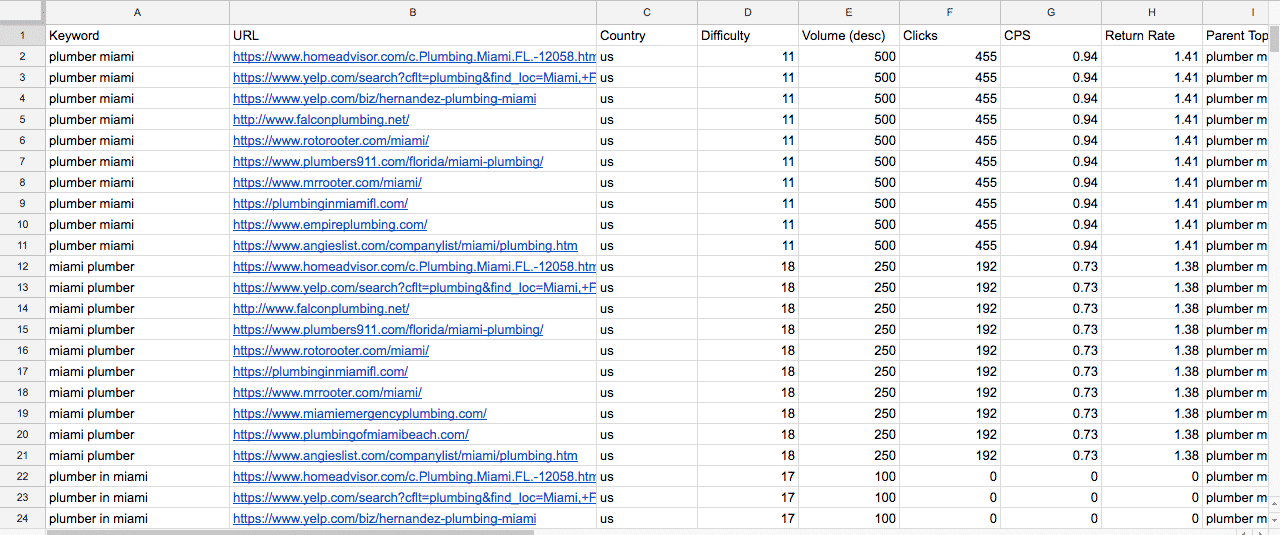
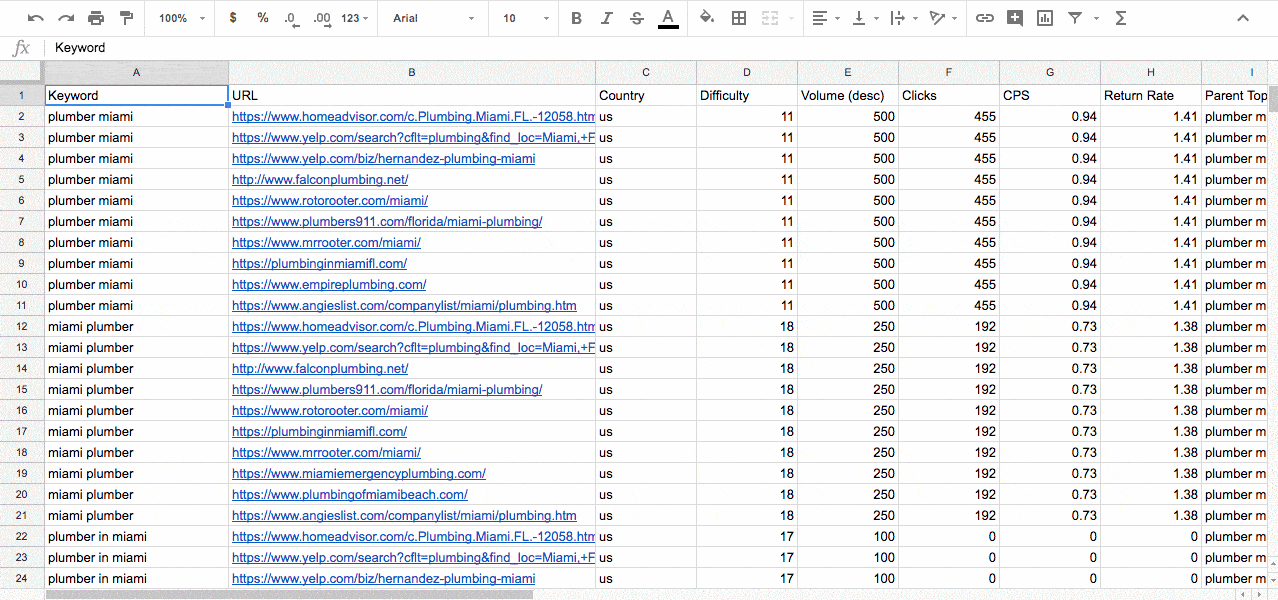
Go to the metrics tab, click the download button to export the metrics for the keywords that you uploaded. When the export pop-up appears, make sure that the Include SERPs option is checked
Next, navigate to the Have Same Terms link to export the results along with their SERPs. The reason why we want to be sure to include the full SERP in our export is that we’ll be using it to prioritize the competitiveness of each location and keyword group later on.
Note that Ahrefs only uses the first 10 keywords in your list, it’s recommended to run your keywords in sets of 10 through the Keywords Explorer to extrapolate your list as much as possible.
Your exported CSV file contains a list of all of your keywords with search volume, CPC, clicks, clicks per search, and return rate along with data on the top 10 competitors including referring domains, URL rating, domain rating the number of keywords the URL is ranking for and estimated traffic.
Unfortunately, as of this writing, Ahrefs doesn’t include the position of each of the SERP URLs but, rather displays it in an ordered list. That means that you’ll need to create a new column called Positions and manually add the position to each of URLs for each keyword.
You can use this handy formula to apply the SERP positions:
=IF(A2 = A1, W1+1, 1)
This formula assumes that the Keyword column is Column A and the Positions column is Column W, if it isn’t adjust the formula accordingly.
Once you apply the formula for all of the keywords in your keyword column make sure to turn formula into values. You can find out how to do it in GSheets here and for Excel here.
Sort & Categorize Your Keyword Data
The next step in the process is to sort and categorize all of your keywords into various dimensions. Doing so will allow you to slice and dice the data into actionable next steps.
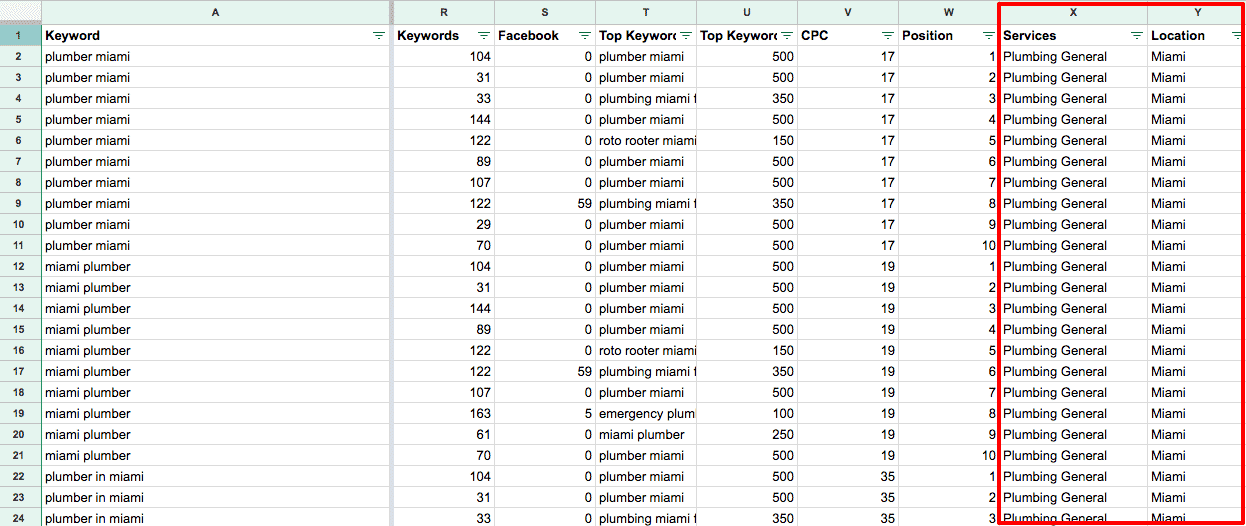
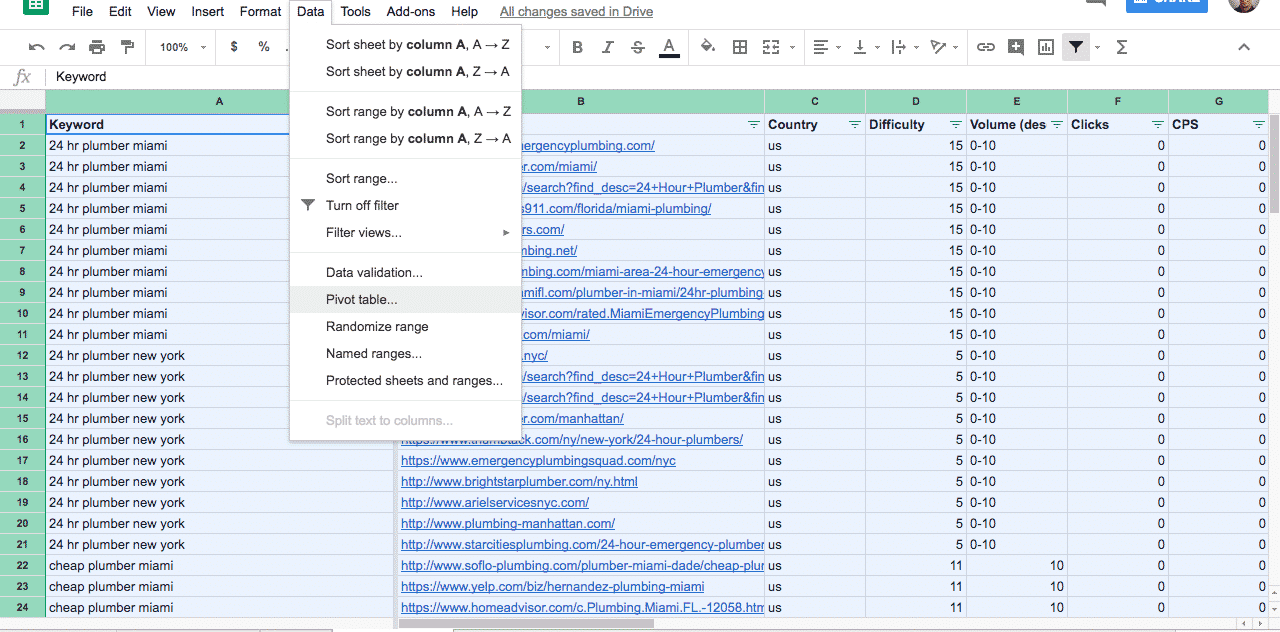
Start by creating two new columns and adding Products or Services to one, depending on your type of business and Location to the other. Go through each keyword row and add the name of the location that keyword is for in the Location column and the product or service that keyword is for in the Product/Service column.
By the end of it you should have something that looks like this:
Creating a Location Prioritization Framework
Now that you have all of your keyword data organized, the next step is to create a matrix that will help you prioritize not just your locations but, specific keywords for each location.
There are two ways to pull this data, either through a Pivot Table or the QUERY function if you’re using Google Sheets. If you’re not familiar with the QUERY function I highly recommend checking out the tutorial on Coding is For Losers.
For the sake of simplicity, I’ll be walking you through the process on how to do it with pivot tables.
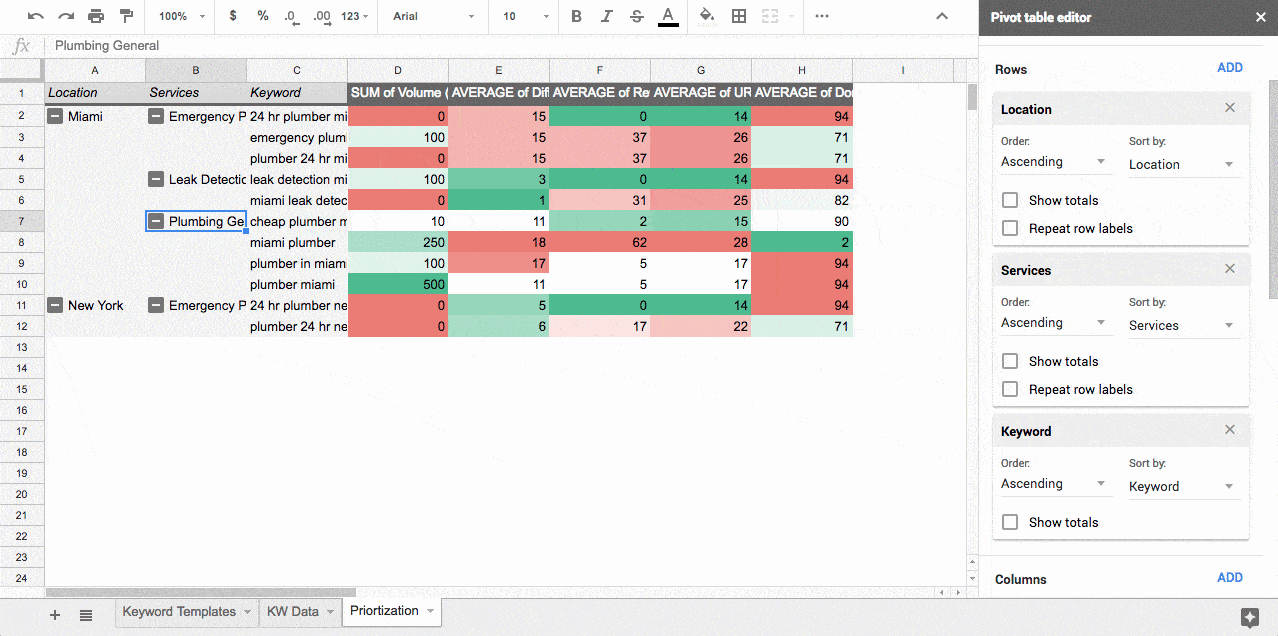
Sorting Your Location Keyword Data
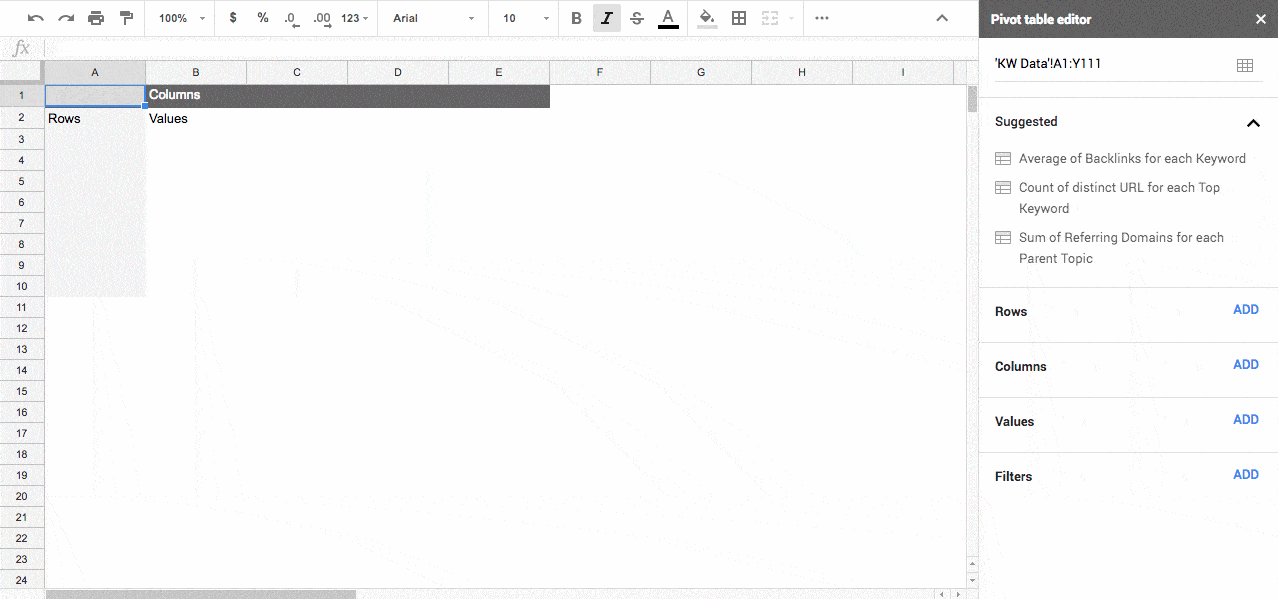
First select all of the data in your Keyword Data tab and insert a Pivot Table:
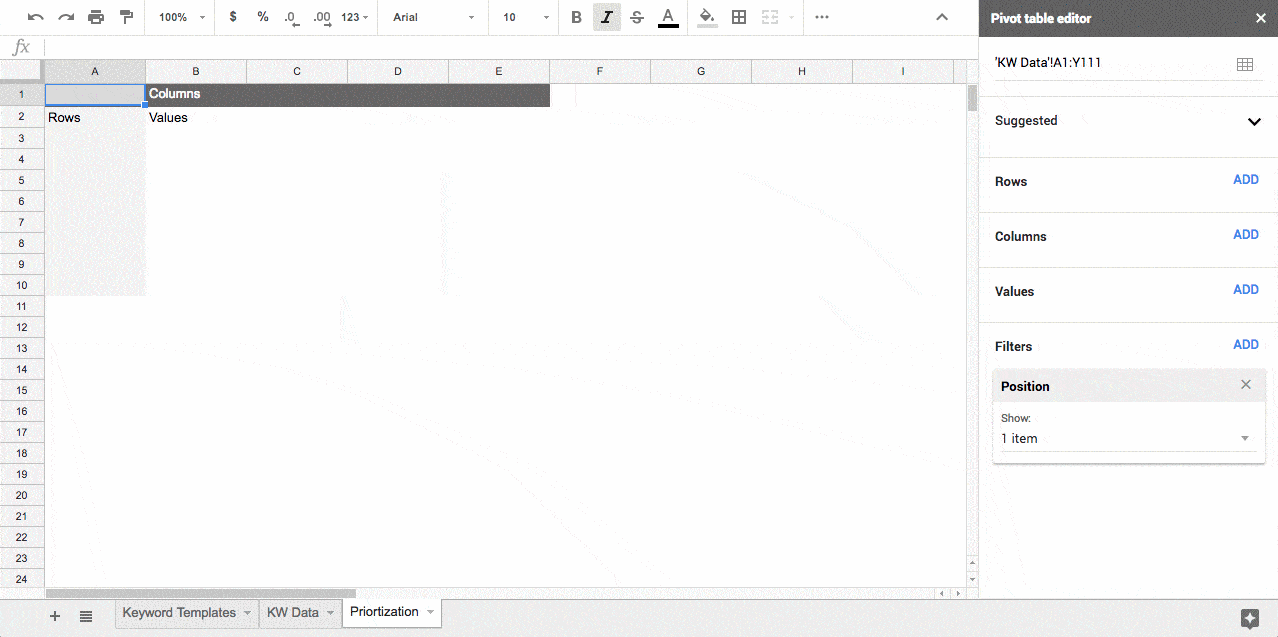
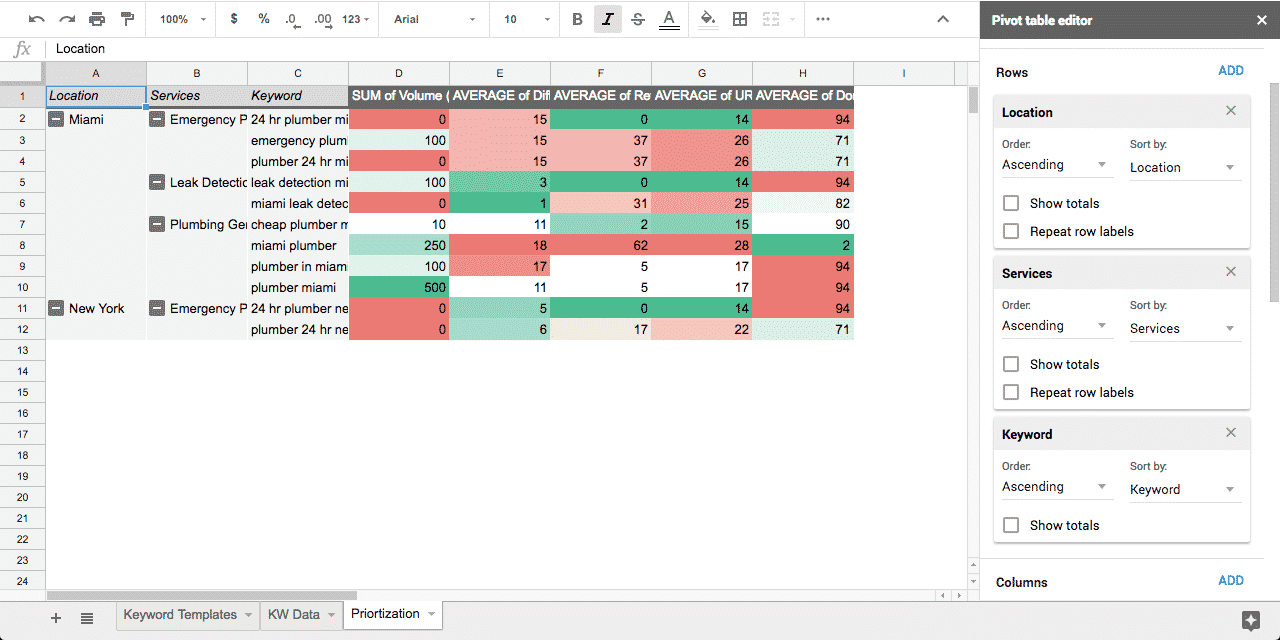
Now add a filter for the Position Column and set it to only show Position 3. Why position 3?
If you plan on ranking on the first page, you’re going to want to ranking in at least position 3, if not the first position, so understanding which URL is ranking and what types of metrics it takes to get there is important. If we take a look at AWR’s organic CTR study, we can see that the higher position you are the lower the click through rate is which results in less traffic.
http://g.recordit.co/AqcuCED2QO.gif
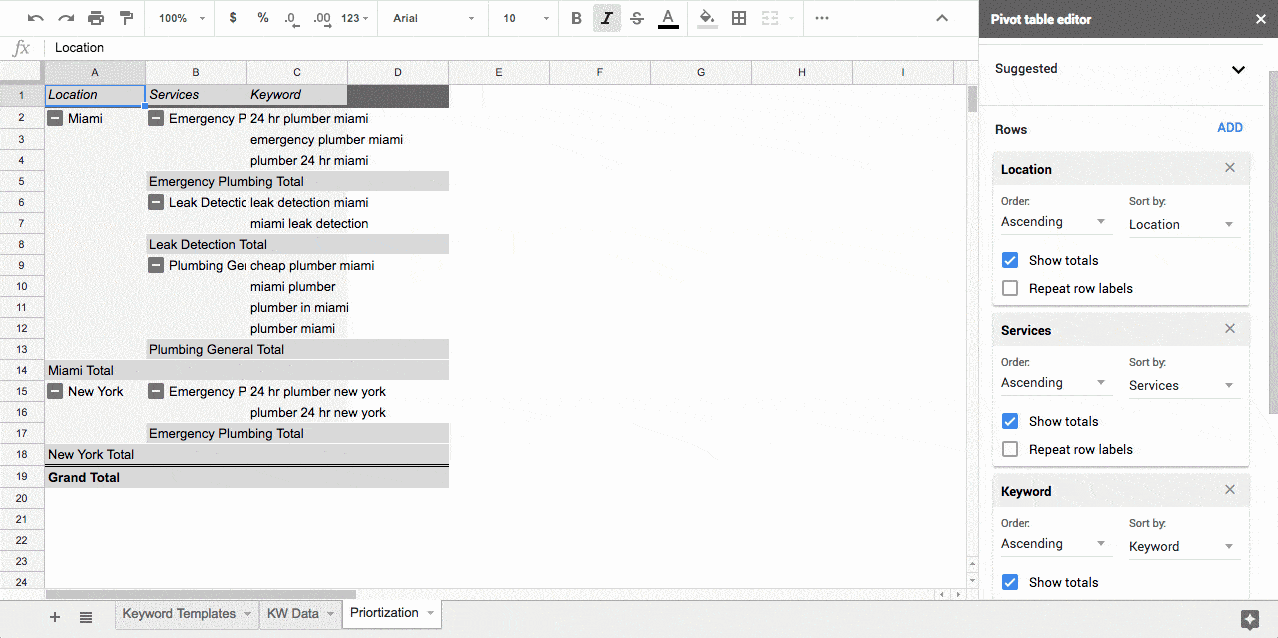
Next in the following order add Location, Products/Services and keywords as rows:
Then add the following metrics and Summarize By values into the values section of your pivot table:
Metric
Summary By
| Keyword Volume | Sum |
| Keyword Difficulty | Average |
| Referring Domains | Average |
| URL Rating | Average |
| Domain Rating | Average |
Now that we have all of our data, the next step is to add some conditional formatting to easily scan the data for each location. Use the following conditional formatting rules for each metric:
Metric
Summary By
| Keyword Volume | Red to Green |
| Keyword Difficulty | Green to Red |
| Referring Domains | Green to Red |
| URL Rating | Green to Red |
| Domain Rating | Green to Red |
You should now have something that looks like this:
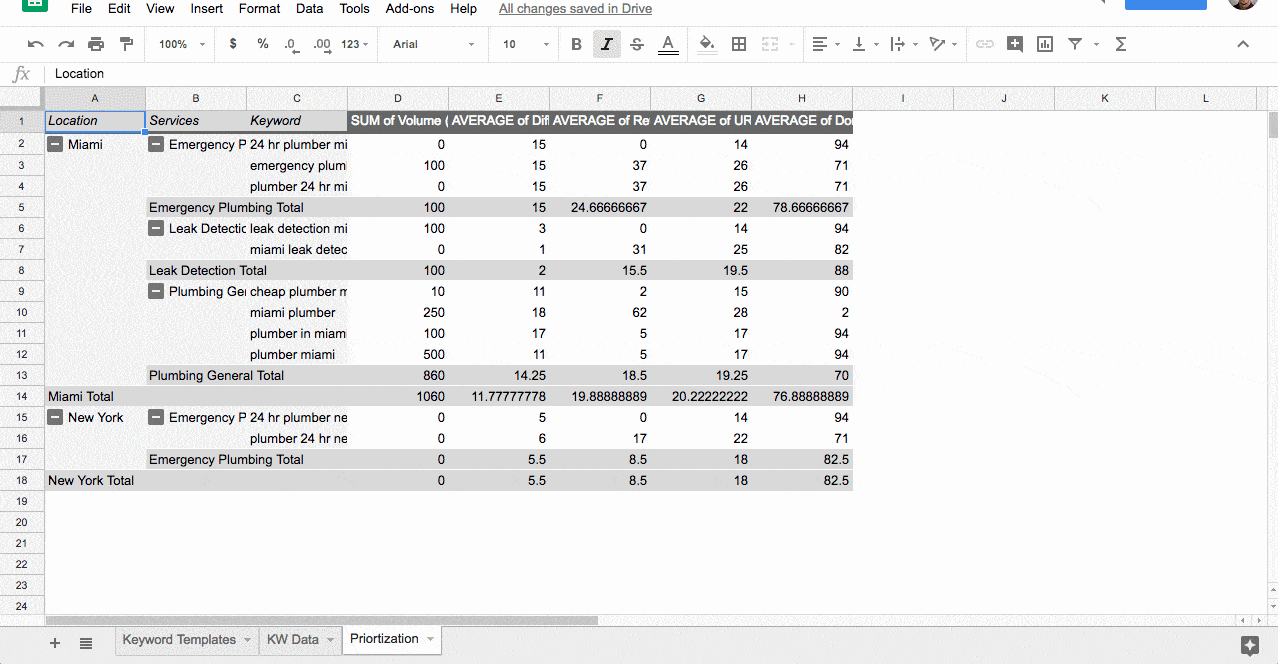
How to Prioritize Your Keywords
The pivot table that you just created will allow you to prioritize on three different levels which are:
- By location
- By location + product/service
- By location + product/service + keyword
Let’s dive in deeper to understand how to look at each level and what the data is telling you.
Prioritizing Locations
The top level, shows you how competitive each of your locations’ SERP are. To view this data simply collapse the Location and the Product/Service rows in your pivot table so it looks like this:

Go through the data and assign a high priority to the rows that are green, which indicate high search volume and low competition, and low priority to rows that are red, which show low search volume and high competition.
If you’re using a location page site structure, then this will help guide you on which location pages to focus on first.
Prioritizing Product/Services
The second level, allows you to view the overall competitiveness of each of your products and services within each location. If you want to view this data, expand the locations that you want to analyze and collapse the Product/Service row. Your pivot table should look similar to this:
Similar to prioritizing your locations, you want to take advantage of the conditional formatting that you set up. Giving a high prioritize rows that are green and a low priority to the competitive red rows.
If you’re using an internal microsite website architecture for your site, then this data will help you prioritize which microsite pages to develop first.
Prioritizing Keywords
The third and final level of your prioritization keyword matrix are the keywords themselves. Ensure that both the Locations and the Product/Services rows are expanded to view the specific keywords for each location and product/service combination:
Just like prioritizing each location and product/service, you want to look for rows of green which indicate high search volume, low competition keyword ranking opportunities.
What’s next?
After prioritizing your locations, product/services and keywords, the next step is to actually go out and execute your local SEO and content marketing strategy
If you’re feeling a little overwhelmed with all of this, then there is no need to worry. You can download the exact keyword research document that we went through to help you save time and better understand how the document works. Download your template now.
